The store will not work correctly when cookies are disabled.
We use cookies to make your experience better.To comply with the new e-Privacy directive, we need to ask for your consent to set the cookies. Privacy Policy.
PWA app development provides users with immediate, secure location information without downloading, transforming the application into a super-fast platform.
It features a straightforward design for effortless website content management and updates, and we ensure that the platform works well with many content types.
Take Your Business Global With Our Premium Solutions
Our website development team has experience in various industry sectors, such as Fashion, Jewelry, Electronics, Furniture, Fintech, Travel, and Health. We help develop user-friendly websites that represent your brand's value on the internet and drive more sales. Our solutions are built for performance, security, and a smooth user experience. Trust our expert team to deliver innovative, scalable web development solutions designed to meet the needs of your industry and drive your business to new heights.
Elightwalk is a 15+ year-experienced global e-commerce development firm that offers a wide range of business solutions. We collaborate with clients of all sizes and shapes worldwide to create excellent digital products that many users use. Our 75+ innovations pave the way for experienced new technologies for our developers. You can rely on our talented team of certified e-commerce and application developers.
To assist you in the straightforward installation of the Magento SMTP extension, we have prepared the following detailed instructions. Use our detailed guide to set up the SMTP Extension for your Magento 2 store.
With the assistance of our Magento 2 SMTP, the business owner can swiftly set up an SMTP server on their online store. The website will be used by the selected SMTP host to send all emails.
Installation Process
Manage Token
You can see package token on style Elightwalk by signing in to your account once you have completed the checkout process from Elightwalk. You can see using the following link Token
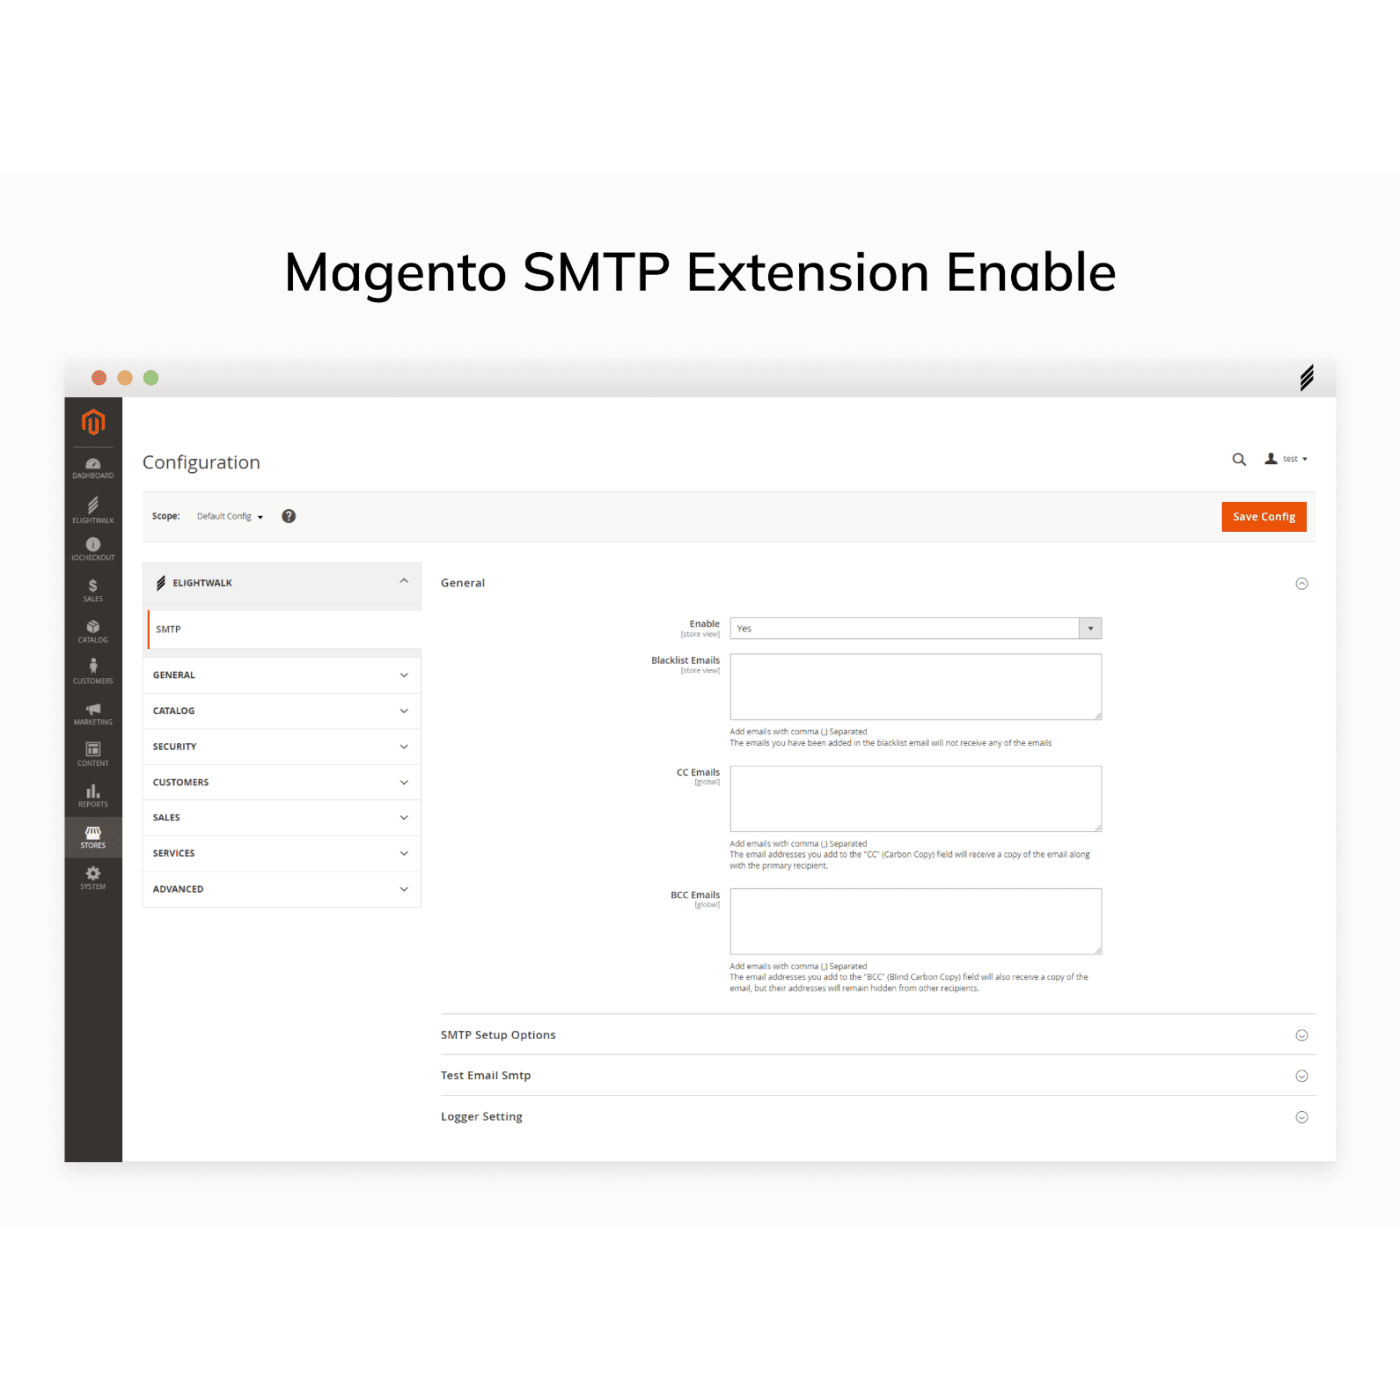
Module Enable: You have to enable the module by setting it to “yes” and then you will get all the functionalities of our Magento SMTP module.
Blacklist Emails: In this section, you can add all the email addresses that you want to block from receiving emails from your store.
CC Emails: The email addresses that you enter into the "CC" (Carbon Copy) section will get a copy of the message in addition to the individual who is the primary recipient of the email.
BCC Emails: The email addresses you add to the "BCC" (Blind Carbon Copy) field will also receive a copy of the email, but their addresses will remain hidden from other recipients.
(Note: You can add multiple emails by separating them with a (,) comma.)
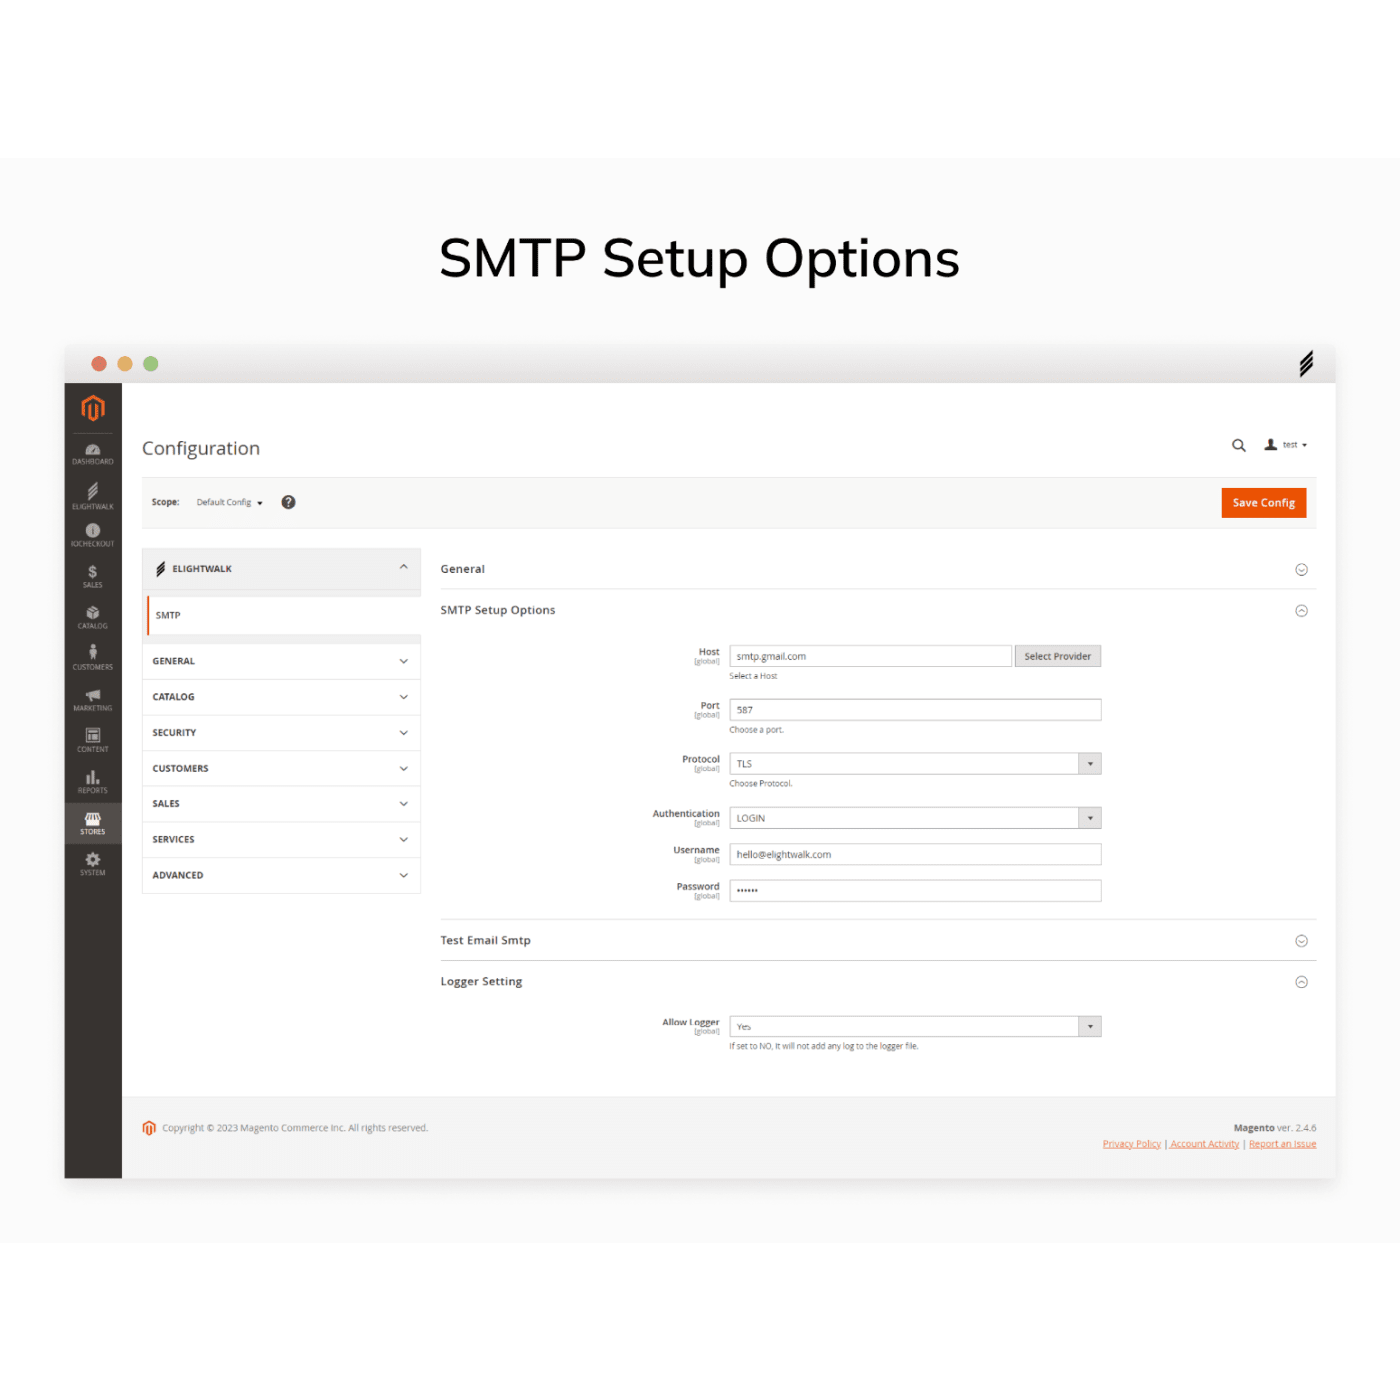
SMTP Setup Option
Host: Here you have to select the host provider of your preference. Toggle on the select provider button and you will get host providers options such as Gmail, Sendinblue, Outlook, SMTP2GO, and sendgrid. Select the preferable host provider from here.
Port: Enter the port.
Protocol: Set your protocol. (TLS, SSL, None)
Username & Password:Enter the username and password here.
Test Email SMTP
From this section, you can send the test emails to validate that your email is working properly.
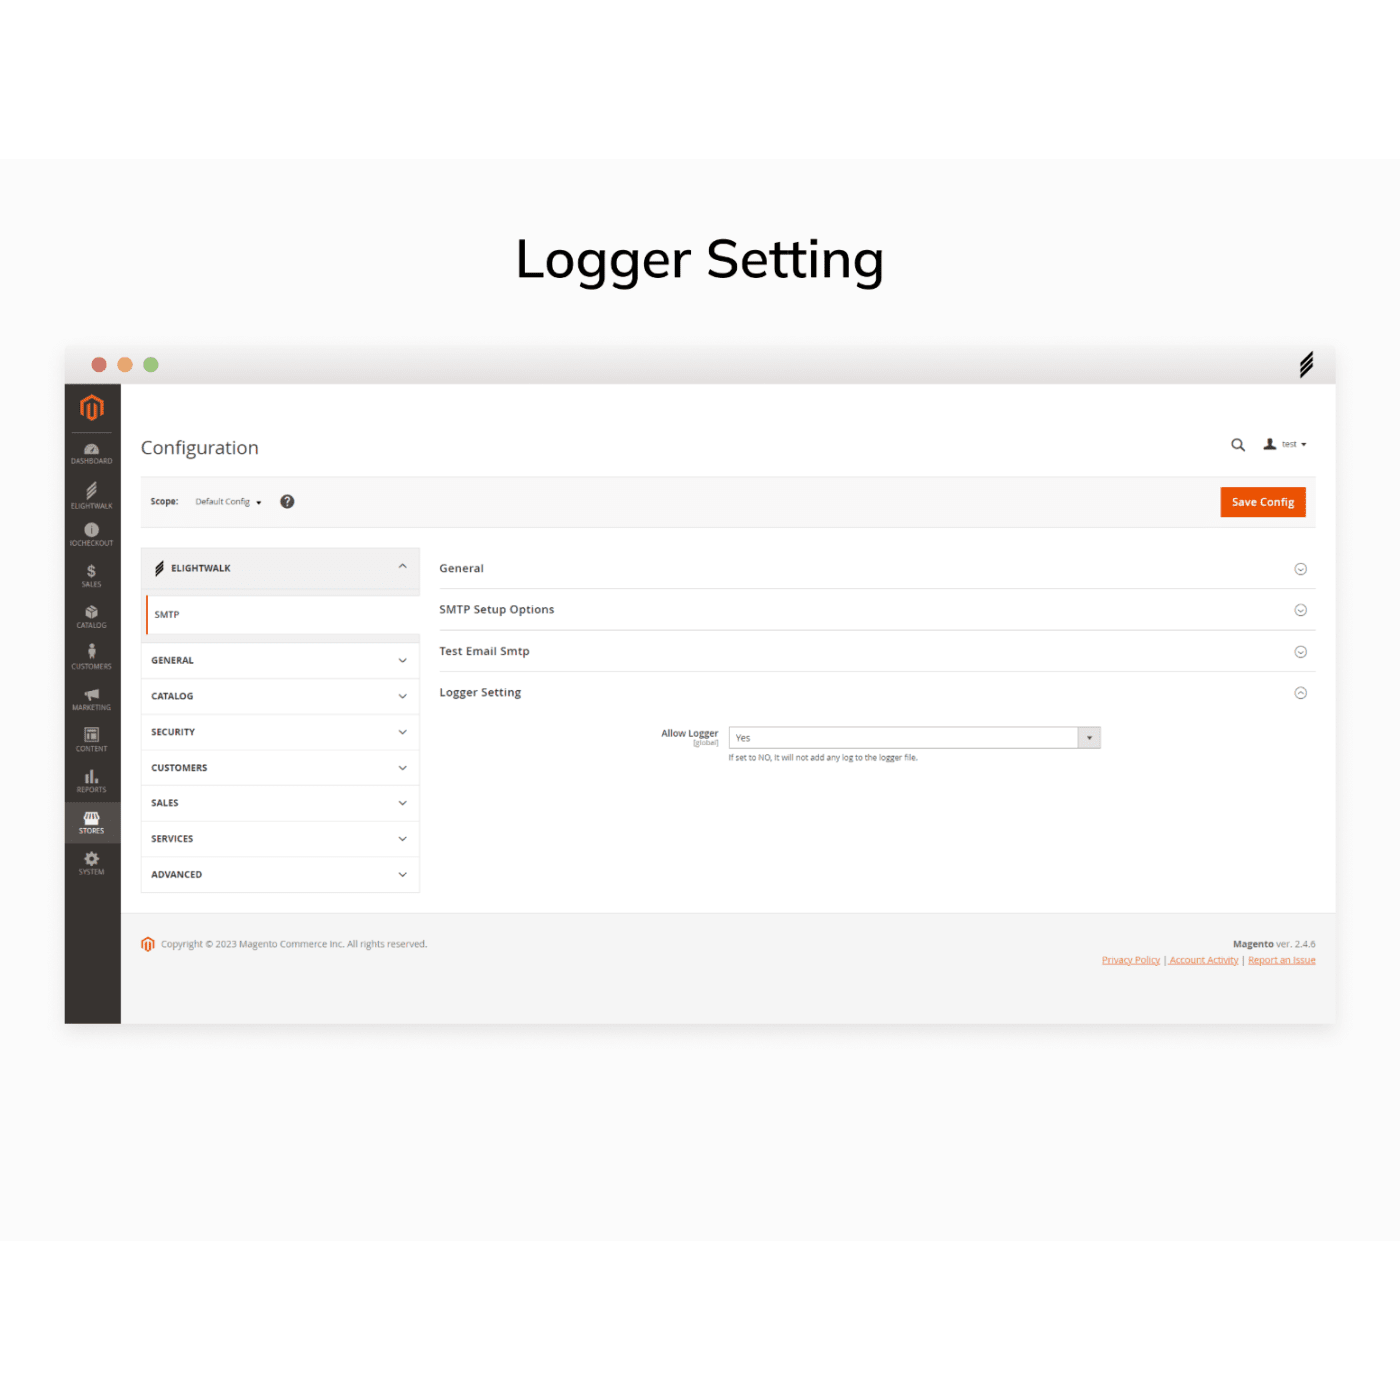
Logger Settings: If set to No, it will not add any log to the logger file.
Description
Our Magento 2 SMTP Extension enables your store to send email with Gmail, Sendinblue, Outlook, SMTP2GO, Sendgrid, etc. you can learn to setup each provider below on SMTP generation steps.
This Magento 2 SMTP extension supports emails to make them work with configured settings. Supporting Providers are the following:
Gmail
Sendinblue
Outlook
SMTP2GO
Sendgrid
SMTP Generation Steps
For Gmail
Here is the step by step process for SMTP generation for Gmail